Unexpected liquid spills on a laptop can be a nightmare, but with the right knowledge and techniques, you may be able to save your device from permanent damage. In this comprehensive guide, we will walk you through the steps needed to clean your laptop after a spill, from assessing the damage to reassembling and testing it. Prevention and protection tips will also be shared to help you keep your laptop safe in the future.
Assess the Damage
Assess the Damage: Evaluating Liquid Damage on Your Laptop
Accidents such as liquid spills can quickly damage your laptop, but don’t panic! Proper assessment of the damage can help you figure out which components are affected and if the laptop is salvageable. Follow these steps to evaluate the extent of liquid damage on your laptop.
Step 1: Disconnect power and remove the battery
- First, shut down the laptop immediately, if it’s still powered on after the spill.
- Disconnect the power adapter and all other peripherals that may be connected to the laptop.
- Flip the laptop over and remove the battery. This is crucial to prevent further damage resulting from electrical shorts.
Step 2: Assess the spill area
- Determine the extent of the liquid spill by observing where it made contact with your laptop. Take note of the area, such as the keyboard, trackpad, sides, or any ports.
- Liquid can seep into various components of the laptop, so knowing where the spill occurred will help you understand which components may be affected.
Step 3: Inspect internal components
- If you feel comfortable doing so, disassemble the laptop to get a more detailed assessment of the damage. Make sure to keep track of all screws and parts removed during the disassembly process. You can refer to the user manual or online tutorials for guidance.
- Look for signs of liquid penetration on the internal components, such as the motherboard, hard drive, RAM, keyboard, and display components.
- Check for corrosion or discoloration on components, as these are signs of liquid damage. Any visible damage may also indicate more severe issues.
Step 4: Determine the type and amount of liquid spilled
- The type of liquid that has been spilled on the laptop may have different affects on its components. For instance, water can cause short-circuiting, while sugary or acidic drinks can leave residue and cause corrosion.
- Assess the amount of liquid spilled. A small spill might only affect the keyboard, while a larger spill could reach the motherboard and other internal components.
Step 5: Assess the viability of your laptop
- If the spill was minimal and you noticed no visible damage, your laptop might be salvageable after a thorough cleaning and drying.
- If the liquid made contact with the motherboard or other critical components, the laptop might be beyond repair or require professional assistance to fix.
Liquid spills can cause irreversible damage to a laptop, but assessing the damage appropriately can help determine whether the laptop is salvageable or in need of repair. Always remember to act fast and disconnect power to avoid further damage when a spill occurs.
Power Down & Disconnect
Introduction:
A liquid spill on your laptop can lead to potential damage to its internal components and even render it non-functional. Immediate action is crucial in preventing further damage. The first and most important step is to power down your device and disconnect any external devices and peripherals. This guide will explain how to do this in a few simple steps.
Materials:
- A clean, dry cloth or paper towel
- A stable and dry surface to place your laptop on
Instructions:
Step 1: Power Down Your Laptop
- Immediately stop using your laptop once the spill occurs. Do not attempt to use it further, as it may cause more damage to the internal components.
- Press and hold the power button on your laptop until it shuts down completely.
- If the spill caused your laptop to shut down by itself, do not attempt to power it back on.
Step 2: Remove the Battery
- Some laptops have removable batteries. If your laptop has one, locate the battery release latch on the bottom of the device.
- Slide the battery release latch and remove the battery from your laptop.
- If your laptop does not have a removable battery, skip to Step 3.
Step 3: Disconnect External Devices and Peripherals
- Unplug any power cords or charging cables from your laptop.
- Disconnect any external devices such as USB flash drives, external hard drives, or printers.
- Remove any plugged-in headphones, speakers, or other audio devices.
Step 4: Open the Laptop and Dry the Surface
- Place your laptop on a stable, dry surface.
- Open your laptop to expose the keyboard and screen.
- Use a clean, dry cloth or paper towel to gently wipe away any visible liquid from the keyboard, screen, and casing. Be careful not to press down too hard, as this may force liquid deeper into the device.
Step 5: Wait Before Continuing with the Cleaning Process
- Wait for a minimum of 10-15 minutes before continuing to allow any remaining liquid on the surface to evaporate.
Conclusion:
By following these steps, you have successfully powered down your laptop, disconnected external devices and peripherals, and minimized potential damage caused by the liquid spill. Remember not to power your laptop back on before you’ve completed the full cleaning and drying process. The next steps involve cleaning the internal components and assessing any potential damage before attempting to turn your laptop back on.
Remove Liquid Excess
Power off and unplug the laptop: As soon as a liquid spill occurs, immediately turn off your laptop and unplug it from any power sources. This will minimize the risk of electrical damage and protect you from potential shocks.Remove the battery: If your laptop has a removable battery, take it out to prevent further damage. If the battery is not removable, proceed to the next step, but do so with caution.Assess the spill: Take a moment to determine the type of liquid, as well as the extent of the spill. Water is less likely to cause damage, while sugary or acidic liquids could cause more severe issues.Grab a soft cloth or paper towel: Find a clean, lint-free cloth or a paper towel to blot the spill. Avoid using anything that might scratch or leave residue on the laptop’s surface.Blot the liquid gently: Do not rub or press too hard, as this could push the liquid further into the laptop. Instead, gently blot away as much liquid as possible using the cloth or paper towel. Start from the outer area of the spill and work your way inwards towards the center.Use gravity to your advantage: To help drain any remaining liquid that may have gotten inside the laptop, carefully lift one side of the laptop and turn the device so the liquid spills out from the side or bottom. Keep the laptop in this tilted position for a few minutes to allow any excess liquid to escape.Use absorbent materials: While the laptop is still tilted, place a layer of absorbent material, such as a dry cloth, paper towels, or even uncooked rice, under the affected area. This will help to draw out any remaining liquid from the laptop.Wait and dry: Let the laptop sit in a well-ventilated area to dry for at least 24 hours. Avoid using heat sources (like hair dryers) to speed up the drying process, as they can cause damage to delicate components.Clean sticky residues: If the spill involved a sugary or acidic liquid, carefully clean the affected areas with a damp cloth and a small amount of isopropyl alcohol. Make sure your cloth is not too wet, as this could cause further damage.Reassemble and test: Once you are confident that the laptop is completely dry, reattach the battery (if removed) and plug it back in. Power on the device to check if it’s working properly.Remember, if you’re not comfortable with this process, consider taking your laptop to a professional technician for proper cleaning and repairs.
Disassemble Laptop
Liquid Spill Laptop Cleaning: Disassembling a Laptop
WARNING: Disassembling your laptop can void your warranty and may cause further damage if not done carefully. Proceed at your own risk.
Before beginning, be sure to consult your laptop’s user manual for any specific disassembly instructions and to identify specific components.
1. Power off the laptop:
Make sure the laptop is completely turned off and disconnected from any external power source.
2. Remove the battery:
Slide the battery release latch and gently remove the battery from its slot.
3. Gather tools:
To disassemble your laptop, you will likely need small-sized Phillips head screwdrivers, tweezers, and a plastic prying tool or a flat-head screwdriver. Ensure you have a clean, organized workspace and a container to keep track of screws.
4. Remove the back cover:
Turn the laptop over and locate the screws holding the back cover in place. In some laptops, the entire back cover must be removed, while in others, you’ll need to access specific compartments. Unscrew and lift the cover(s) carefully.
5. Disconnect and remove components:
Depending on how far you need to disassemble your laptop for cleaning, you may need to remove additional components such as the hard drive, optical drive, and RAM. Unscrew any screws securing these components and gently disconnect them by pulling or sliding them out of their slots.
6. Remove the keyboard:
Turn the laptop right-side-up and open the lid. Locate the keyboard screws (often indicated by a keyboard symbol) on the bottom of the laptop, and unscrew them. Use the plastic prying tool or flat-head screwdriver to lift the keyboard gently from one corner. Once the keyboard is partially lifted, carefully disconnect any ribbon cables connecting it to the laptop’s base.
7. Access the internals:
With the keyboard removed, you’ll now have access to more screws securing the top case to the base. Unscrew these and use the plastic prying tool to separate the top case from the base, revealing the internal components.
8. Remove the cooling fan and heat sink:
Locate and unscrew any screws holding the cooling fan and heat sink in place. Gently disconnect any cables attached to the fan. Lift the cooling fan and heat sink assembly out of the laptop case.
9. Remove the motherboard:
Carefully disconnect any remaining cables connecting the motherboard to other components, such as the speakers, USB ports, and display. Unscrew the screws securing the motherboard and gently lift it out of the laptop case.
10. Clean the affected areas:
With the laptop disassembled, use a soft, lint-free cloth and a mixture of 90% isopropyl alcohol to gently clean any affected areas. Allow the components to air dry for several hours before reassembling your laptop.
11. Reassemble the laptop:
To reassemble your laptop, follow the steps in reverse order, starting with the motherboard and finishing by replacing the back cover.
12. Power on the laptop:
Once the laptop is fully reassembled, plug in the battery and power on the device to ensure it is functioning correctly.
Note:
It is crucial to allow all components to dry completely before reassembly to prevent any chance of short-circuiting or permanent damage.
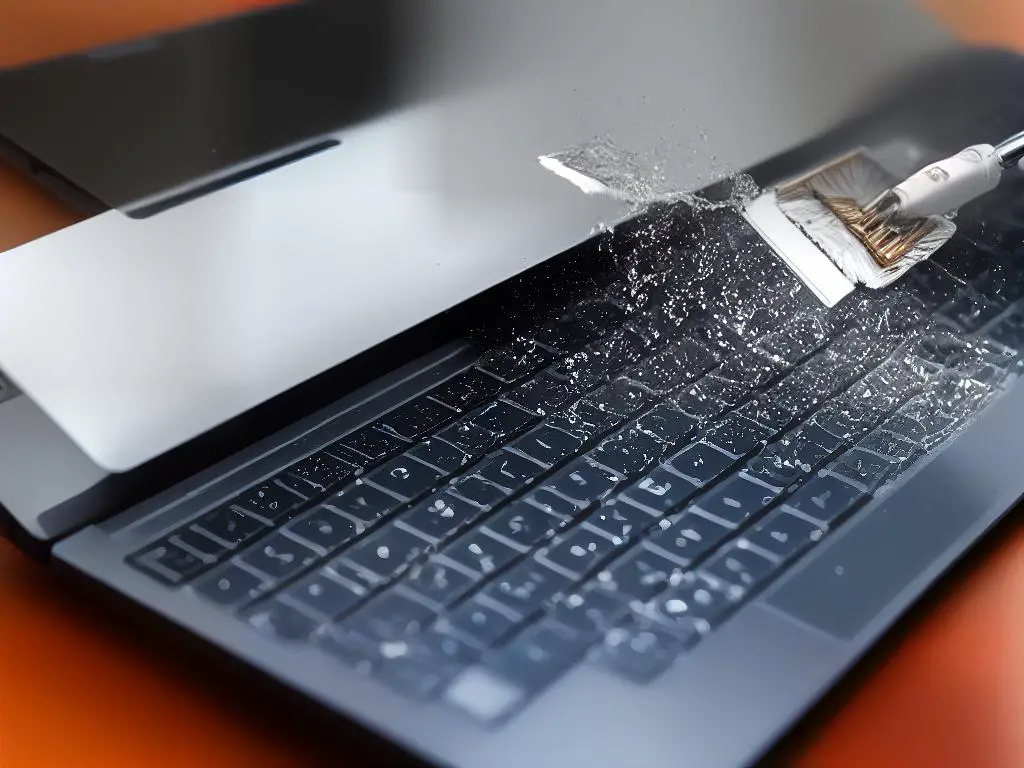
Cleaning Components
Accidental spills can happen to the best of us, and sometimes, our laptops are the unfortunate victims. Knowing how to properly clean your laptop components may save you from costly repairs or data loss. In this guide, we will discuss the best cleaning techniques and solutions for removing liquid and residue from your laptop’s internal components, such as the motherboard and keyboard.
Important Note: Always disconnect the laptop from power sources and turn off the device before starting the cleaning process. Also, consider seeking professional help if you are uncomfortable with performing these tasks yourself.
Materials Needed:
- 99% isopropyl alcohol
- Distilled water (if needed)
- Soft-bristle toothbrush
- Lint-free cloth or microfiber cloth
- Cotton swabs or Q-tips
- Screwdriver (specific to your laptop model)
- Compressed air (optional)
Step 1: Disassemble your laptop
- Consult your laptop’s user manual for specific instructions on disassembling your device.
- Carefully remove all screws and keep them organized for reassembly.
- Gently remove the laptop’s casing and locate the affected components.
Step 2: Remove and clean the keyboard (if affected)
- Gently disconnect the keyboard from the motherboard.
- Mix equal parts 99% isopropyl alcohol and distilled water.
- Dip a cotton swab or Q-tip into the cleaning solution, and gently clean the keys and board of the keyboard.
- Use a soft-bristle toothbrush to gently scrub away any remaining residue.
- Let the keyboard air dry completely before reassembling the laptop.
Step 3: Clean the motherboard and other components
- Determine which areas of the motherboard and other components are affected by the spill.
- Use a soft-bristle toothbrush dipped in 99% isopropyl alcohol to gently scrub the affected areas, focusing on any residue buildup.
- After scrubbing, use a cotton swab or lint-free cloth to wipe down the affected areas with isopropyl alcohol to remove any remaining residue.
- If your laptop has a fan, use compressed air to blow out any residue or dust that may have accumulated.
Step 4: Dry the components
- Allow all components to air dry completely before attempting to reassemble the laptop. This may take several hours to ensure that all moisture has evaporated.
- Do not use a hairdryer, as the heat may damage the internal components.
Step 5: Reassemble the laptop
- Once all components are completely dry, carefully reassemble the laptop by following the disassembly steps in reverse order.
- Make sure all screws are securely fastened and connections are properly seated.
Step 6: Test the laptop
- Reconnect and power on the laptop to ensure it is functioning properly.
- If the laptop does not work or displays issues, consult a professional for further assistance.
Cleaning your laptop components affected by a liquid spill can be a delicate process, but with patience and the proper techniques, you may be able to save your device from significant damage. Always handle your laptop and its components with care, and consider seeking professional assistance if you are unsure about the cleaning process.

Drying Process
Introduction:
Spilling liquid on your laptop can be a nerve-wracking experience, but knowing how to properly clean and dry it can save your device from permanent damage. When a liquid spill occurs, it is crucial to act fast and ensure that all internal components are thoroughly dried before reassembling the laptop. This guide will provide you with step-by-step instructions on the drying process, which will help minimize the risk of damage to your laptop.
Materials Needed:
1. Lint-free cloths
2. Screwdriver
3. Compressed air or canned air
4. A fan (optional)
5. Desiccants (e.g., silica gel packets or uncooked rice)
6. A sealable plastic container or bag (optional)
Step 1: Turn Off Your Laptop
Immediately following a liquid spill, power off your laptop by holding down the power button until the device shuts down completely. This will help prevent further damage from electrical shorts or corrosion.
Step 2: Remove the Power Source
Unplug the laptop from any power source and remove the battery, if possible. This will help reduce the risk of electrical damage during the cleaning and drying process.
Step 3: Disassemble Your Laptop
Using a screwdriver, carefully disassemble your laptop, removing the back cover, keyboard, and any other parts necessary to access the internal components. Be sure to keep track of all screws and parts as you do this. Consult your laptop’s user manual or look up instructions online if you’re unsure how to disassemble your specific laptop model.
Step 4: Absorb Excess Liquid
Using lint-free cloths, gently blot away any excess liquid from the internal components of the laptop. Be mindful not to spread the liquid or push it further into the device.
Step 5: Air Dry the Components
Set the disassembled components of your laptop out on a clean, dry surface to air dry. Use compressed or canned air to blow out any remaining liquid from difficult-to-reach areas, such as under the keyboard or within the laptop’s housing. You can also use a fan to speed up the air drying process by setting it to blow over the components.
Step 6: Use Desiccants
To help absorb any remaining moisture from your laptop’s components, place them in a sealable bag or container with desiccants, such as silica gel packets or uncooked rice. Make sure the components are not in direct contact with the desiccants to prevent contamination or damage. Seal the container and let the components sit in the desiccants for at least 24-48 hours.
Step 7: Check for Residual Moisture
After the drying period, carefully examine each component for any signs of residual moisture. If any moisture is still present, allow the components to air dry for an additional 24 hours or until completely dry.
Step 8: Reassemble Your Laptop
Once you have confirmed that all components are thoroughly dried, carefully reassemble your laptop. Be sure to return all screws and parts to their original locations, ensuring that everything is securely fastened.
Step 9: Power On Your Laptop
Reconnect the power source and battery to your laptop, and power it on. If everything has been dried properly and no major damage occurred during the liquid spill, your laptop should power on and function normally.
Conclusion:
Dealing with a liquid spill on your laptop can feel overwhelming; however, following these steps for properly drying the internal components can greatly improve your chances of salvaging the device. Remember that the key to success is acting quickly and ensuring that the laptop’s components are thoroughly dried before reassembly.
Reassemble & Test
After carefully cleaning and drying your laptop from a liquid spill, it is now time to reassemble it and conduct some basic troubleshooting tests to ensure that your laptop is functioning properly. This guide will walk you through the steps for reassembling your cleaned laptop and testing its performance in American English.
Tools Needed:
- Screwdriver (as per your laptop’s screws)
- Soft, lint-free cloth or microfiber cloth
- Compressed air
Instructions:
- Reattach internal components
- Start by connecting and placing all of the previously removed internal components back into their respective slots and positions.
- Attach all ribbon cables, ensuring they are securely connected.
- Insert the motherboard:
- Carefully place the motherboard back into the laptop case, ensuring it’s aligned with the screw holes and ports.
- Screw the motherboard back into place with the appropriate screws.
- Reinstall the cooling system:
- Replace the heat sink and cooling fan onto the CPU, securing them with the respective screws.
- Verify that the fan is properly connected to the motherboard.
- Reinstall the battery:
- Carefully reinsert the laptop battery back into the case.
- Secure it with any necessary screws or clips.
- Reassemble the laptop case:
- Carefully reattach the laptop’s top cover or keyboard, ensuring that all connectors and cables are connected properly.
- Apply gentle pressure around the edges to snap any clips back into place.
- Replace any screws that were removed during disassembly.
- Connect peripherals and power supply:
- Reattach any external devices that were previously connected to your laptop (e.g., USB devices, monitors).
- Connect your laptop charger to the DC-in port and plug it into your electrical outlet.
- Perform a visual inspection:
- Double-check that all screws, cables, and components have been replaced and secured.
- Ensure that there are no missing parts, screws, or cables.
- Power on your laptop:
- Press the power button to turn on your laptop and wait for it to boot up.
- If the laptop starts up correctly and you can see your desktop or login screen, that’s a great sign! You may proceed with the following tests.
- Basic troubleshooting tests:
- Test your keyboard: Open a text editor or your browser’s address bar and press each key to ensure they are working.
- Test your touchpad: Navigate around the screen using the touchpad to verify proper functioning.
- Test the display: Check for any abnormalities in the display (dead pixels, discoloration, etc.).
- Test audio: Play a video or song to test the laptop’s speakers.
- Test USB ports: Plug in a USB device and verify that it is recognized and functioning.
- Additional steps (if needed):
- If you encountered any issues during testing, it’s recommended to seek professional assistance to diagnose and repair your laptop.
- If your laptop does not power on or exhibits significant issues, consult your manufacturer’s support or visit a local repair shop.

Prevention & Protection Tips
Maintain a clean workspace: Keeping your desk or workspace clean and clutter-free can significantly lower the chances of accidentally knocking over a drink and spilling it on your laptop. Make sure to remove any unnecessary items, especially liquids.Use spill-resistant containers: If you must have a drink nearby your laptop, opt for spill-proof or spill-resistant cups, bottles, and mugs that come with a lid or a seal. These containers can help save your laptop from an accidental spill.Create a designated drink area: Consider creating a specific area away from your laptop where you can store your beverages. This can help you train yourself to keep liquids away from your electronics.Keep laptop elevated: Using a laptop stand or riser can help keep your laptop off the surface directly and provide an additional barrier against spills. Should a spill occur, your laptop will be less likely to come into contact with the liquid.Use a keyboard cover: A silicone keyboard cover is an affordable investment that can help protect your laptop’s keyboard from spills. The cover is easy to apply and remove, and can be washed and dried separately when needed.Invest in a laptop sleeve or case: A laptop case or sleeve can provide extra protection against spills when your laptop is not in use. Make sure to choose a water-resistant or waterproof option for maximum protection.Keep your laptop closed when not in use: Closing your laptop when it’s not in use can minimize the risk of liquid finding its way into ports and other internal components.Don’t use your laptop with wet hands: It might seem like a simple precaution, but ensuring that your hands are completely dry before using your laptop can go a long way in preventing liquid spills and potential damage.Develop good habits: Finally, cultivating good habits such as always placing your drink away from your laptop, maintaining a clean workspace, and keeping your laptop elevated can help prevent spills and their damaging consequences.

Dealing with a liquid spill on your laptop can be a daunting task, but with patience and the right approach, many laptops can be saved from ruin. By understanding how to assess the damage, clean and dry components, and properly reassemble your device, you’ll have the best chance of rescuing your laptop in such events. And, don’t forget to take preventative measures to ensure your device remains protected from potential spills in the future.